Baked Earth: The Making of a Greek Pot

Eye of the Day|How to Make a Greek Pot| design

The Making of a Greek Pot

This month I’m going to discuss a tool that has captured my imagination for nearly 40 years: THE POTTER’S WHEEL. It started for me in Orange County California in 1976 at Irvine High School. For my P.E. class I was taking surfing and the instructor also taught Ceramics. It didn’t take me long to figure out that all the cool kids not only took surfing, but took Ceramics for second period, so if the waves were particularly good, the surf class would just stay and surf all the way through second period!

Thirty years later, I am still doing ceramics, primarily because of my fascination with the potter’s wheel, which is a relatively new invention in the history of pottery making. Originally functional vessels made of clay were constructed using a coiling technique. The artist would roll out “ropes” of clay and slowly, methodically, hand turn a small form by placing the coils on top of each other and pinching each coil into the one beneath it. Although this time honored method can be very slow and tedious in terms of production, there are still many cultures in the world that use this technique to create functional ceramic containers.

Eye of the Day|How to Make a Greek Pot| design
The potter starts to form the base of the pot on a hand-turned wheel.

The potter’s wheel was born out of necessity. There are many theories, but all agree it was a matter of industrialization that brought about its creation. Recently I found a few video clips in my inbox that Brent (owner of Eye of the Day) had shot on the Island of Crete. They are an intimate look at the processes used in the production of the authentic Greek vessels Eye of the Day sells. The pieces are wheel thrown but on a wheel that is hand cranked by a potter’s assistant. The clay is made into fat coils, and added to the clay beneath it by pinching. Then the assistant spins the wheel faster and the potter begins to lift the clay into a form. It is particularly fascinating that Greece employs both old and new world techniques. They start with a slab of clay for the bottom, and work their way up by coiling, and pinching, and finally throwing the clay into shape. In the videos you see that there are multiple wheels working at once with vessels on each, in different stages of completion. When the clay needs to rest on one wheel,, the potters move in succession to each wheel down the line, until returning to the beginning to continue working toward a finished piece. These pieces are then fired and shipped directly to Eye of the Day.

We are very lucky to have this direct connection to handmade vessels for our garden design needs. The next time you are at Eye of the Day, remember what it takes for the artisans who build these vessels to deliver such an authentic and timeless piece of history for our own daily aesthetic.

Eye of the Day|How to Make a Greek Pot| design
Greek pots at different stages of creation.


Rebecca Sweet On Shades of Gray in the Garden

Eye of the Day|Rebecca Sweet|Shades of Gray Garden

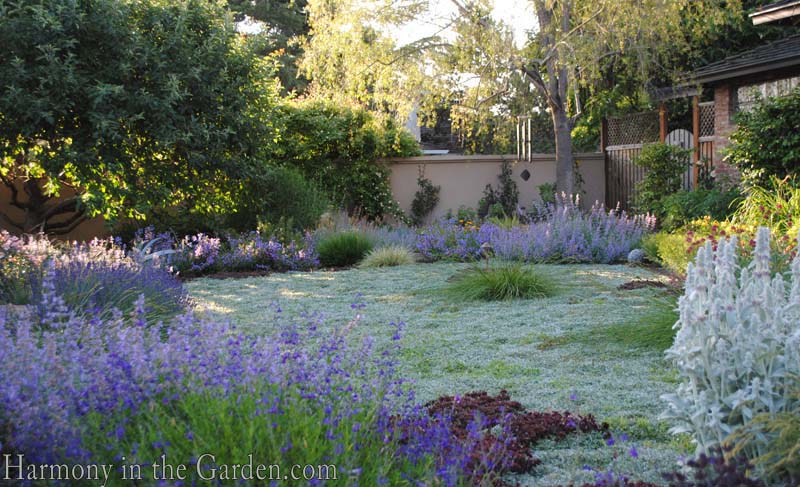
One of my favorite gardens that I designed a few years ago is a great example of how you can replace a water-thirsty lawn with lush looking, and less thirsty, plants.  One of the most successful strategies we used was to swap out the turf lawn and install a drought-tolerant Dymondia margaratea ‘lawn’ in its place.  But first, a little background and a few before & afters:

My client’s home is located on a busy corner within a stone’s throw of two nearby schools, has giant picture windows throughout the house and has a 4-foot high wall that surrounds most of the garden (a Lookiloo’s fantasy!)  What this translates into is the homeowners were on constant display to traffic and pedestrians alike and felt like they were living in a fishbowl, for all to see.

The lack of privacy would tempt many to build a fortress-like wall to surround the garden, but staying true to their welcoming personalities, they decided to create a garden that others might equally enjoy (after all, if they’re going to peek over the wall they might as well have something nice to look at, right?)

Tired of their threadbare, un-used, water-thirsty lawn and random mishmash of plantings, they wished for a more responsible, fun, and ‘livable’ garden that used less water and incorporated plenty of native plants to encourage wildlife to visit.  Our first step was to rip out the lawn and reinterpret a newer, smaller version using Dymondia.  I chose Dymondia because it’s extremely tough, drought-tolerant, evergreen and can withstand a fair amount of foot traffic. Plus, it’s just so darnned pretty.

Their concern, however, was that using such an expansive amount of the color gray in the garden would have a blinding, bright and parched effect.  This is a perfectly valid concern, and one that I’ve often heard from other clients who have experienced the unintended ‘glare’ in their gardens as a result of an overuse of gray plants.   To help avoid this common pitfall of using gray in the garden, here are a few tricks I’ve used to help tone down the brightness while still enjoying this beautiful color.

Shades of Gray

First, it’s important to realize that there are different shades of gray ranging from light & bright, to mid-level gray all the way to dark, charcoal-like foliage. And because of this range, it’s important to understand that not all grays are alike.  It’s perfectly okay to use plenty of gray plants in the garden, as long as you vary the shading.  No one wants to look at one bright gray plant after another without a place for the eye to rest, so remember to use plenty of mid-level and dark gray plants sprinkled throughout.

Keeping it Lush

In order to prevent gray colors from creating a ‘pass the sunglasses’ effect in your garden, it’s also important to include plenty of nearby plants that have deep, rich colors, such as burgundy, green and purple. In this garden, the plants chosen included the brilliant blue flowers of our native ‘Blue Springs’ Penstemon, vibrant purple Lavender and the deep burgundy Stonecrop that creeps throughout the edges of the Dymondia lawn.

Lambs Ear is used sparingly throughout the garden, as it’s a really bright shade of gray, almost bordering on white, and could easily cause the Dymondia to appear brighter than it actually is.

In fact, each Dymondia leaf consists of two colors – green on the bottom and silvery gray on top.  And once the Dymondia begins to grow and fill out (forming a soft and inviting 3-inch spongy mat), its slender leaves will begin to twist gently, revealing its different colors.

To further emphasize the green in the bi-colored foliage, I’ve included plenty of other surrounding plants with green colors to help strengthen the color echo.

For example, I’ve interspersed our native Carex divulsa (Berkeley Sedge) and Calamagrostis foliosa (Feather Reed Grass) throughout the lawn, as well as lots of perennials with green foliage.

It’s not just Dymondia that has hefty amounts of green in its coloring – take a look at a lot of other gray plants and you’ll notice green beneath the gray ‘fuzz’ (ie: many lavenders, senecios and hostas).  To emphasize the blue tones of the gray Dymondia colors, I also included plenty of blue plants in the garden, as well – like this ‘Beyond Blue’ fescue, various succulents, and many blue-flowered perennials.

My goal was to emphasize the tones and colors that I want while minimizing the tones that I don’t want.  Can you imagine how bright the garden would be if I had used an overabundance of white flowers and foliage?

Hardscaping

Hardscaping (such as nearby flagstones, patios and sidewalks) plays an important role when placed near gray plants as it, too, can serve to either tone down the brightness or amp it up to blinding proportions.

For this garden, we chose flagstones with slightly creamy-pink tones to them.  Again, the reason was to de-emphasize the bright gray colors by introducing softer muted shades to tone things down.

I’ve seen plenty of instances where a drift of bright gray plants, such as Lamb’s Ear or Artemesia, have been placed directly adjacent to a bright white cement walkway. And 9 times out of 10, that’s the area the homeowner is referring to when they say they don’t like the color gray.

To eliminate this blinding effect, just remember to use hardscaping ( as well as plants) with softer tones and/or darker colors.

A year after this garden was installed, we compared water bills – the result was amazing!   Compared to the wall-to-wall ‘carpeting’ of lawn from before, the new garden uses 40% less water, even though there is a ton of plants in this garden!  This shows that with creative and careful plant selection, and water-efficient drip irrigation, the result can be breathtaking while using much less water.

Summer 2015 Garden Design Magazine Review

Eye of the Day|Garden Design Magazine Summer 2015

GARDEN DESIGN: QUICK! GRAB YOURSELF A COPY!

Eye of the Day has been involved with the publication Garden Design magazine for many years. The latest iteration  of this “magazine” is quarterly and feels more like a book than a periodical.  There is absolutely no advertising to interrupt the flow of articles and inspiring photographs.

My eye was first caught by the Editor’s Note  “Moonshot Thinking for a Low Water World” in which Thad Orr, Editor-in-Chief, discusses replacing lawn with water-wise alternatives involving collection systems and irrigation monitoring. On the facing page is Fresh: Inspiration and Innovations from the World of Garden Design.  This article addresses “Tough Questions about Drought” by asking four people: the Director of the Nature Gardens of the Natural History Museum of Los Angeles, the Director of the Landscape Architecture and Horticulture Gardening Programs at UCLA, a well-known Californa Landscape Architect and the Water Efficiency Manager of Irvine Ranch Water District, what can be done to conserve water this summer and in the future. Initially, this was all I needed to  continue reading; we all need to immerse ourselves in questions and answers about water usage.

Elise’s Gift showcases the historic Redford Gardens in Quebec, illustrating the article about one of the largest plant collections in North America and the story of its founder, Elsie Stephen Redford with photos of the abundant flora of the gardens that were once the family’s fishing camp. Reading about Elsie’s vision and involvement in her “garden” overlooking the St. Lawrence River has me wishing for an in-depth  biography of her life.

These are only a few of the gems between the covers of Garden Design. This impressive publication is just jammed with articles and photos that are so interesting, beautiful and thought provoking that even those of us not claiming to be gardeners  will just want to absorb.

Subscribe here.


Garden Cocktails: A Refreshing Summer Rickey Recipe

Eye of the Day|Gin Rickey| Garden Cocktails

Make this and drink it now! (or maybe later): It’s good for you and your garden

Summer. It’s hot, it’s the weekend and you would like to have a tall, icy drink outside next to the garden you have worked in all day.  At least, Brent has worked in it all day.  Daisy and I have been working to come up with this:

SUMMER RICKEY (one drink)

  • A few fresh mint leaves or a few fresh basil leaves  right from your garden
  • 2 oz Plymouth or other high quality gin
  • ½  oz Pernod
  • ½ lime from your lime tree
  • Fever Tree Club Soda or other high quality club soda
  • A splash of tomato water (see below) made from YOUR tomatoes

Muddle the mint or basil leaves (or both!) in a mixing glass, add the gin and Pernod and some ice and stir. Strain it into a highball glass packed with crushed ice, squeeze in half a lime and drop into the glass, stir again, fill with soda water, top with a splash of tomato water. Garnish with a sprig of mint or basil and a straw (preferable a striped one).

TOMATO WATER

Chop a pound of ugly but juicy tomatoes, place in a large strainer over a large bowl and let them drain for a few hours.  Don’t press on the tomatoes.  The liquid in the bowl should be slightly pink (or yellow if you used yellow tomatoes) and mostly clear.  Use the tomatoes in some other delicious recipe, but use the water in a Summer Rickey or just drink it.


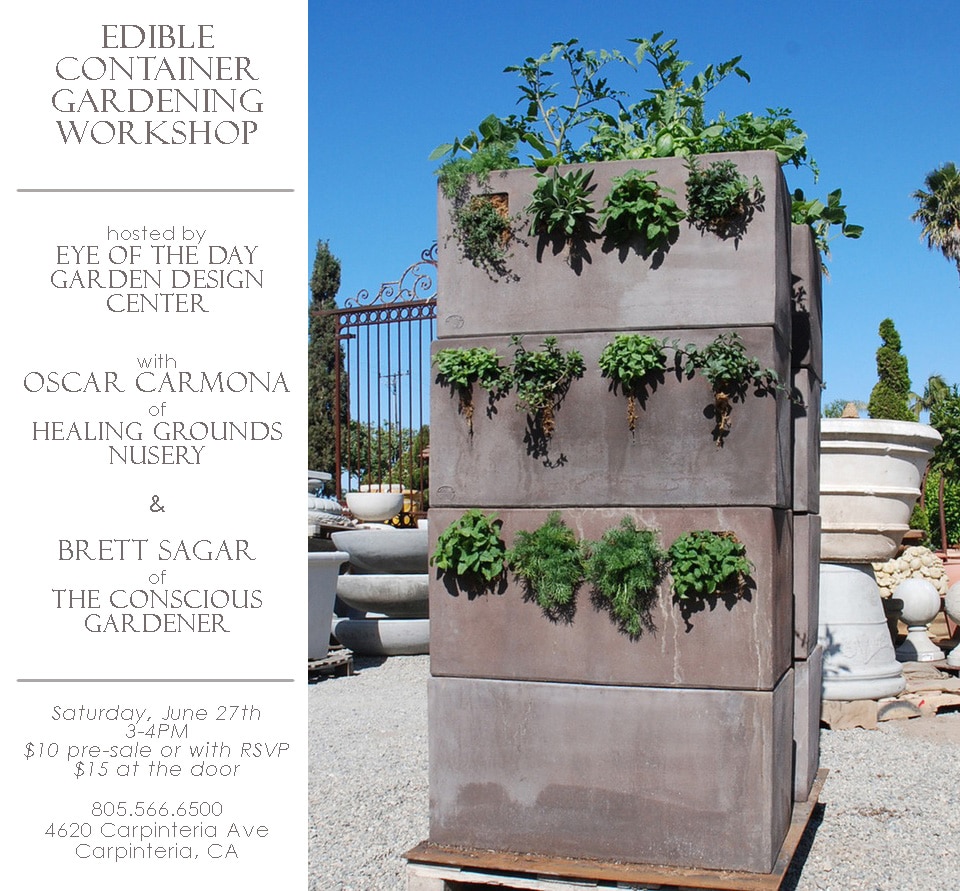
Eye of the Day’s Edible Container Gardening Workshop

Edible Container Gardening Workshop Ad 1 copy


Eye of the Day Garden Design Center is pleased to announce an Edible Container Gardening Workshop right here at our store.

It will be conducted by Oscar Carmona of Healing Grounds Nursery and Sagar Faucheaux  of The Conscious Gardener.

When: Saturday, June 27th

Time: 3-4 PM

Where: Eye of the Day Garden Design Center, 4620 Carpinteria Ave, Carpinteria, CA

Attendance is only $10 before June 27th or $15 at the door.
Attendees who RSVP before the day of the event will be guaranteed the $10 fee.
All participants may have their entrance fee credited toward any purchase on the day of the event!

RSVP at 805-566-6500 or suzi@. Space is limited so please contact us to reserve your spot.


Top Your Pot with Tumbled Terracotta

Eye of the Day|Tumbled Terracotta Pot Topper|Baked Earth

TOP YOUR POT WITH TUMBLED TERRACOTTA

You have a beautiful citrus tree and a beautiful pot, together making a perfect statement piece, but maybe there’s something to make it even better from a design standpoint and for water conservation.

Design professionals typically use under-planting to finish the look of  a tree or tall plant in a pot.  They might use Alyssum,  Baby Tears, Lobelia,  Creeping Rosemary or any other trailing or low-growing plant.  During our current drought, we see more succulents being used, such as String of Bananas, String of Pearls,  Hens and Chicks or Sedum as under-planting and as a living mulch. You can see these same plants in action as part of our video: How to Convert a Fountain to a Succulent Garden. 

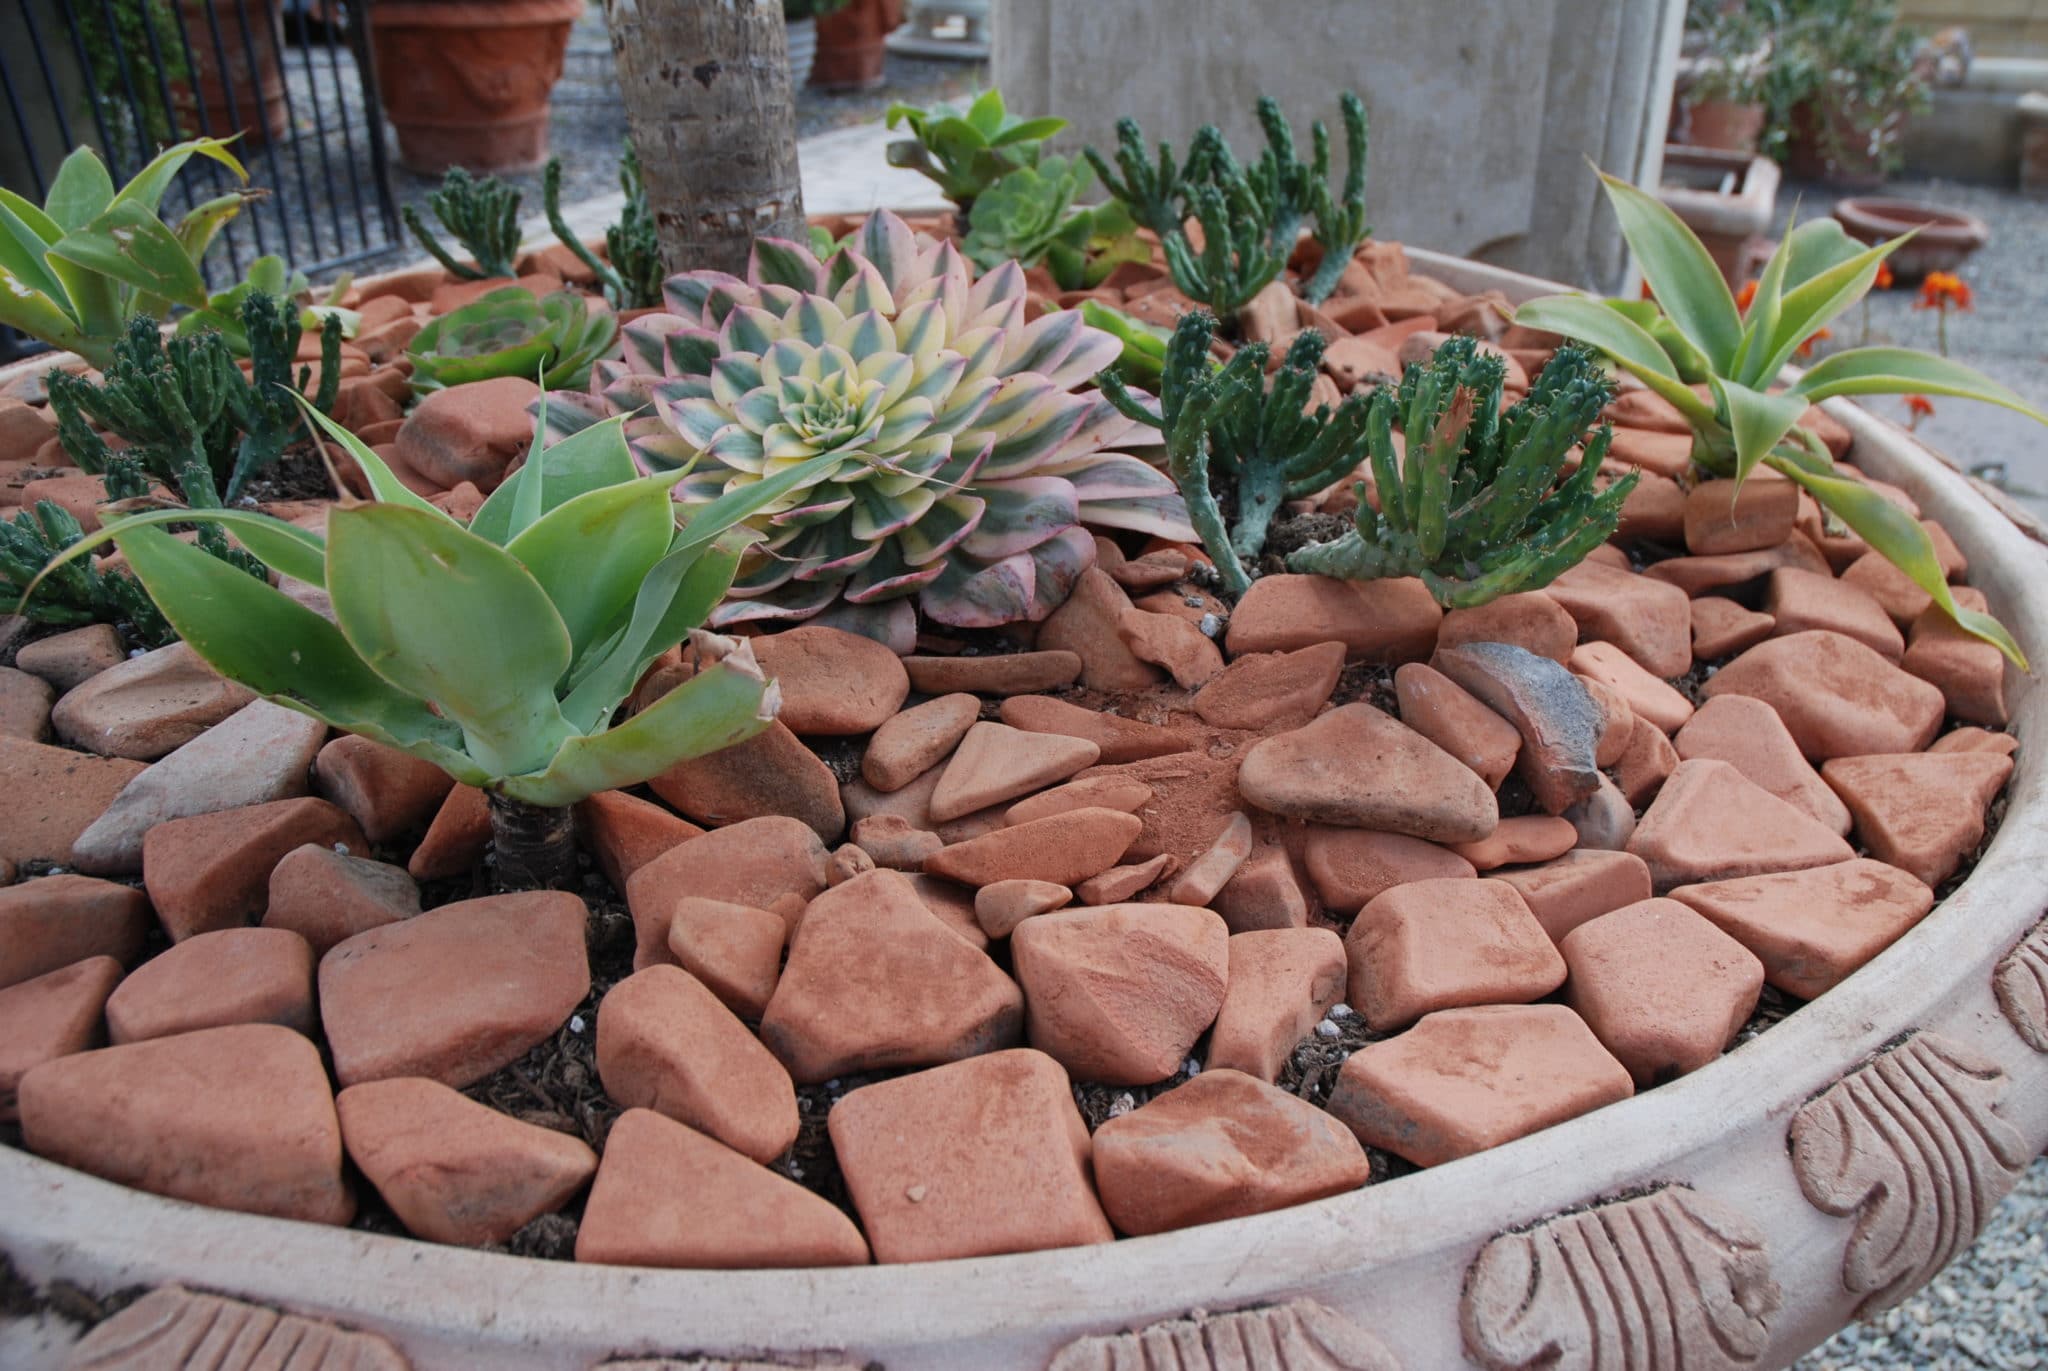
More recently, designers have moved beyond plants and have progressed to using tumbled glass in almost any color, moonstones and beach pebbles.  At Eye of the Day, we are ALL about terracotta, so we have developed a new “pot topper” which not only looks beautiful, but helps maintain and control soil moisture in the container while allowing the surface of the soil to breathe (VERY important to container health).

This new product is Tumbled Terracotta, produced from Italian terracotta fragments, tumbled to soften the edges.  Succulents, cactuses and aloes can also be planted between the pieces for a more carpeted effect further enhancing the design and beauty of container planting.

Our Tumbled Terracotta is available in pieces categorized into three sizes, small at $3 per pound, medium and large at $2 per pound.  The next time you visit Eye of the Day, we’ll show you how using Tumbled Terracotta Pot Toppers adds beauty and practicality to your container planting.